
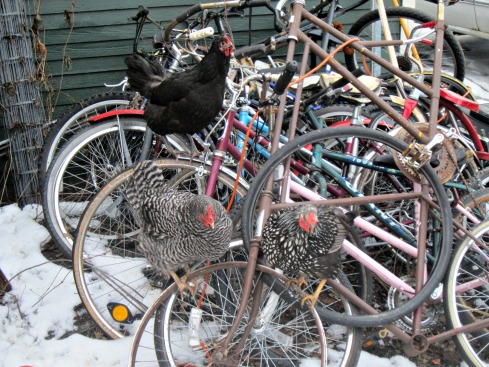
The ladies have NO interest in getting their feet in the snow
We’ve been flying by the seat of our pants pretty much from the get-go with our chickens. We’d been trying to get chickens for a couple years, but things just kept falling through. We finally decided that we’d just order them even though we had to move again, and they were going to show up a few days after we moved. We were tired of waiting for the perfect timing; we’d just pull the trigger and make the timing work. Still neck deep in boxes, we picked up our day old chicks. Fortunately, that meant we had plenty of boxes to make our brooder out of. We’d read far enough into our chicken books to know what we needed to do.
We did plan ahead for some things; others caught us a bit off guard. One of those was a water heater. We live in Minnesota, so we knew that we were eventually going to need something to keep the water from freezing in the winter, but we’d purchased the chicks in the spring so it wasn’t at the top of our priority list. We started talking about it again as the weather got cool, but fall lasted surprisingly long for Minnesota. All of a sudden we were hit with a cold snap, and their water started freezing. It wasn’t freezing solid, but freezing enough around the edges that we had to go out once or twice a day to make sure that they still had liquid water. The heated version of our water font ran about $50, and of course money was tight when the cold snap hit, so we were figuring out who got paid next so we could purchase it. In the meantime I started trying to think up my own system for keeping the water from freezing. I came up with an idea, but I wanted to make sure that it was a viable option before I did it so I went online to check it out. Why I didn’t immediately look online for “DIY chicken water heaters” is beyond me. I guess I’m still of the mindset that I need to figure it out for myself. I ended up finding a water heater idea that I liked better than mine and changing it a bit to fit the materials I had on hand, and to make it a bit safer. I had all of the materials on hand, but it probably would have run $5 if I had to purchase the items.
Here’s what you’ll need to make one:
- 1 lamp holder
- Scrap of wood (about 10×10”)
- extension cord
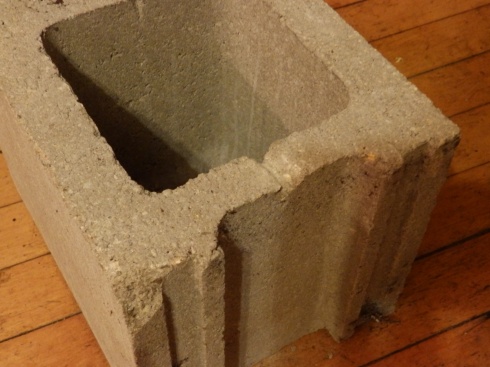
- 8x8x8 concrete block
- 2 wood screws
- Light bulb (about 60w)
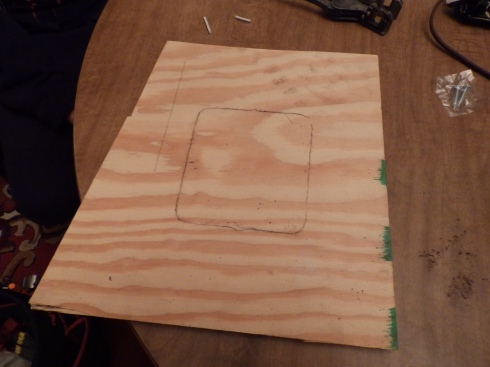
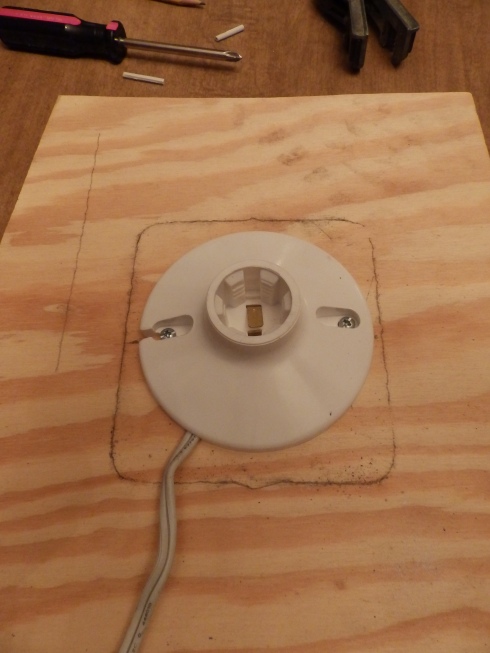
Center your concrete block on your scrap of wood and trace the opening onto the wood. (My concrete block isn’t an 8x8x8″ block. It was actually a leftover piece from building this shelf: /building-a-custom-cinder-block-shelf/)
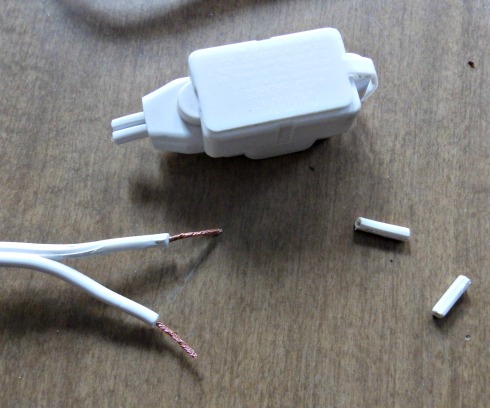
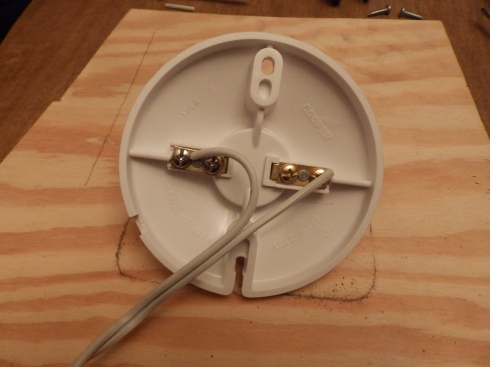
Cut the receptacle end off your extension cord leaving the plug and about 6 feet of cord. Separate the cord sides of the last 2 – 3inches of cord. You can use a sharp knife if you need to, but make sure not to expose the wire inside. Strip the covering from the last half inch of wire.
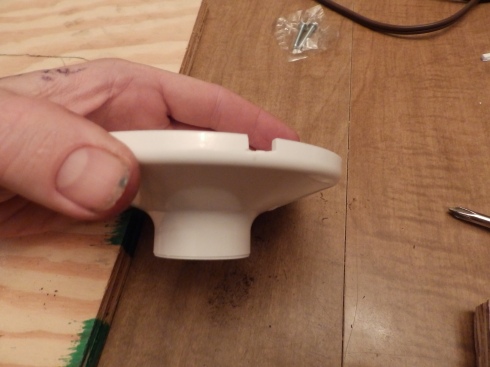
Cut a groove in the bottom of your lamp holder for the cord to pass through. I cut 2 slits with a saw and then broke the piece out using pliers.
Attach the wire to your lamp holder. This is as simple as loosening the screws on the bottom, wrapping the wire around them, and then retightening them.
Once your cord is securely attached, you can attach your lamp holder to the wooden base with your wood screws.
Your concrete block should already have a little grove, but you’ll need to make it a little bigger so the wire can pass through it. My daughter did this part with a hammer and chisel in about a minute.
All there is left is to set the block over the lamp holder, making sure the wire passes through the groove. Insert a light bulb, and plug it in.
(EDIT! We had some trouble with water condensing and dripping onto the bulb which would then break. This problem was easily solved by placing a large mouth pint mason jar over the bulb. We haven’t had a bulb break since and a 78watt bulb has always kept the water from completely freezing)
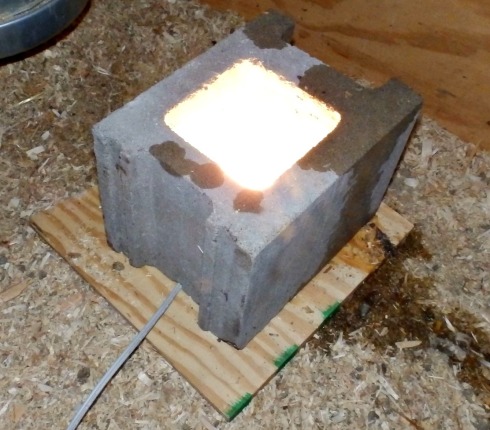
The water font sits on top of the brick, and the heat from the light bulb keeps the water from completely freezing. (This is why you need an incandescent bulb) One thing we realized after a few days is that the water condenses on the bottom of the font and drips on the light bulb, which then breaks. You don’t get a lot of water dripping, but one drop on a hot bulb will break it., so we fixed that by setting a wide mouth mason jar over the bulb.


When I originally made this I ran a drop cord under the door to plug it in. Since then I’ve used added an outlet to the chicken coop, and used wire clips to attach the cord to the base of the heater as well as the wall. I didn’t want loose wires dangling around in there.
